Guide
Your first drawing in OpenDraft
Draw, modify, undo, save and plot in ten minutes, using the command line.
1. Draw a line
OpenDraft is built around a command line. Click on it, type a command’s short name and press Enter (or the space bar). It then prompts you step by step, and you can click points or type coordinates.
Command: L
Specify first point: 0,0
Specify next point or [Undo]: @100<30
Specify next point or [Undo]: <press Enter to finish>- @100<30 means 100 units long at 30 degrees, from the last point.
- C draws a circle, REC a rectangle, PL a polyline, A an arc.
2. Change what you drew
Modify commands work the same way: start the command, pick objects, answer the prompts.
- M moves, CO copies, RO rotates, MI mirrors, SC scales.
- O offsets a line or curve by a distance. TR trims and EX extends to other objects.
- F fillets a corner and CHA chamfers it.
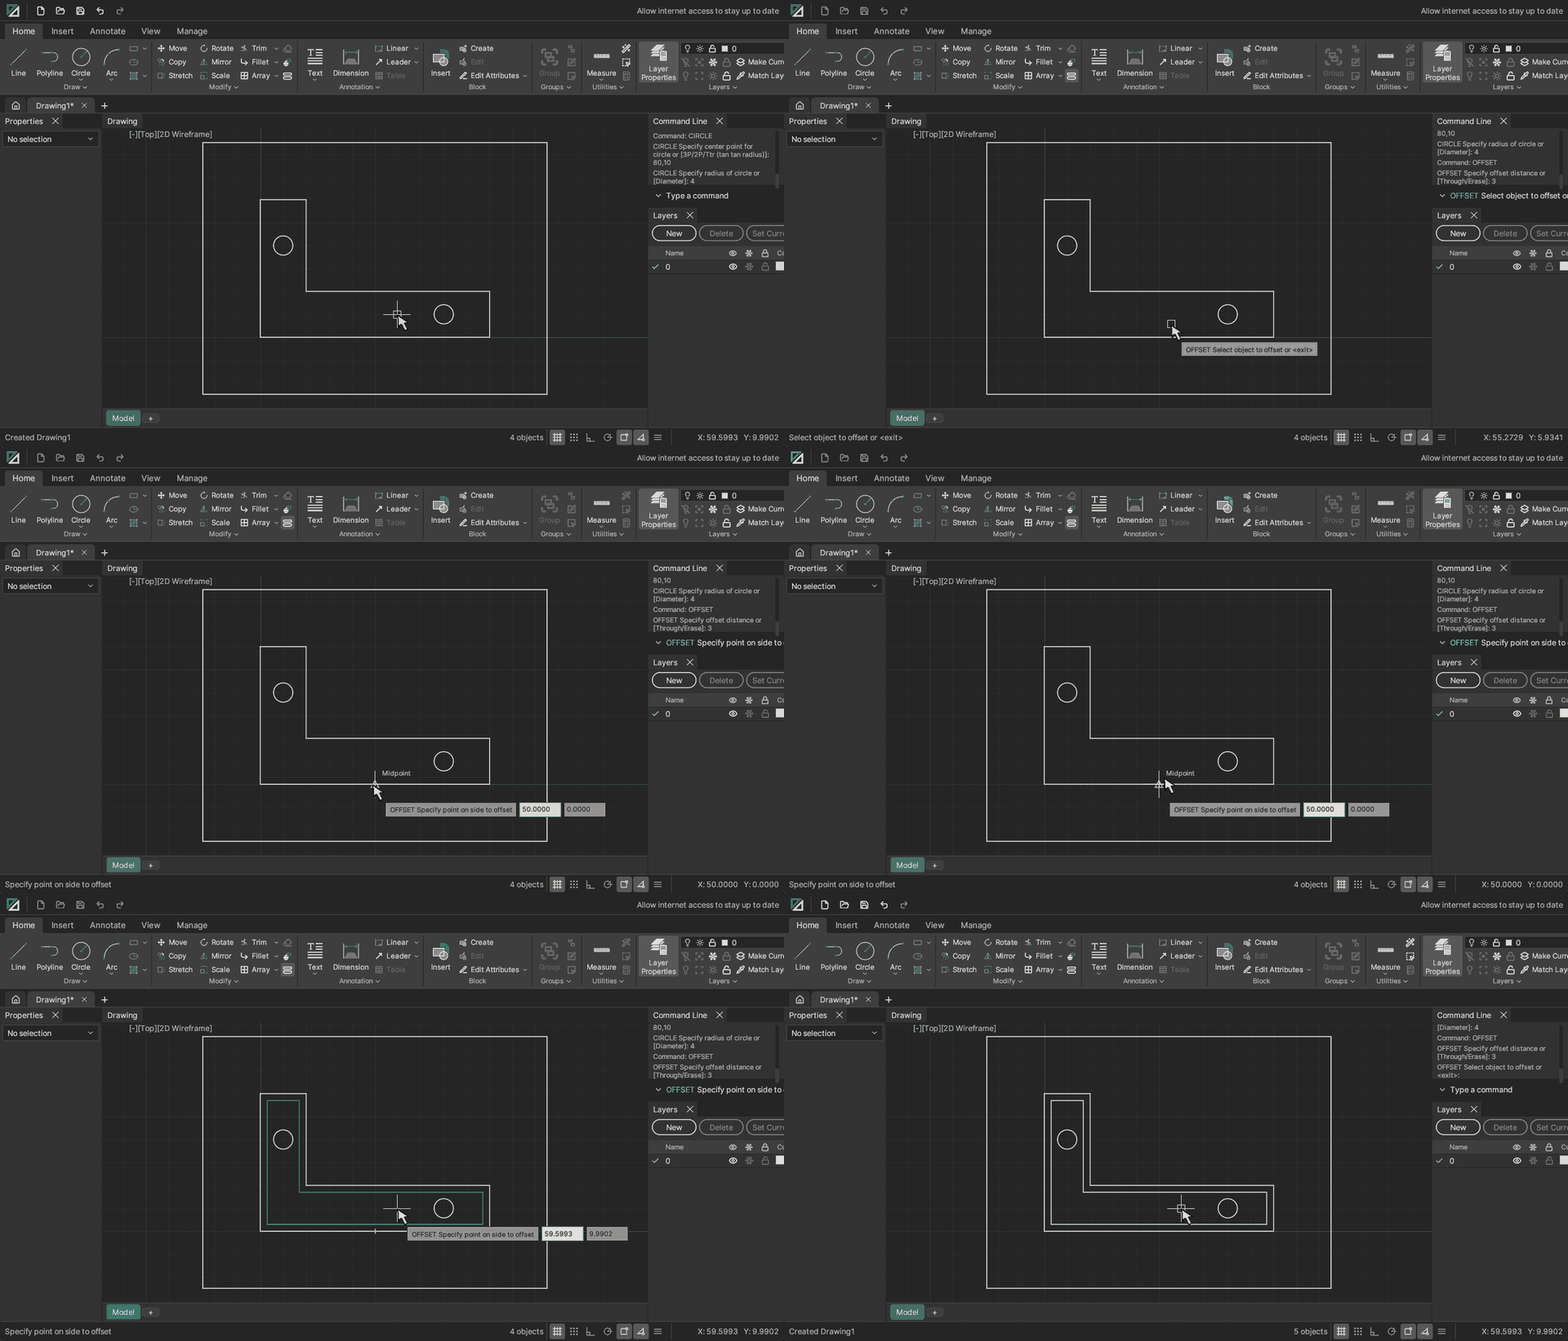
3. Draw precisely
- F8 toggles ortho, which keeps lines horizontal or vertical.
- F3 toggles object snaps, which snap to endpoints, midpoints, centres, intersections and more.
- Typed coordinates always work, so you can draw exact geometry without any snaps.
4. Undo freely
Every change you make is one undo step, grouped per command, so Ctrl+Z (or U) takes back exactly one command. A command that fails part-way does not leave half its changes behind.
5. Save safely
OpenDraft saves atomically and keeps autosave and crash-recovery copies. Its native .odx format is still in development and can change between releases, so also save a DXF copy of anything you care about: File > Save As, then choose DXF. Any version of OpenDraft, and other CAD programs, can read it.
6. Plot or print
Press Ctrl+P. Choose the paper, scale and area, check the preview, then send it to a PDF, an SVG or a printer. Plotting to a file works at 1:1 in millimetres. Printing to paper is new in 0.2.0, so tell us how it goes with your printer.